Getting Started with Fable PixiJS
Dec 21, 2017This post is part of the F# Advent Calendar in English 2017. Thank you Sergey, who’s been keeping the F# community updated weekly for over 5 years!
We’re going to take a look at how to get started creating cool stuff with Fable and PixiJS. PixiJS is a a JavaScript library that creates very fast 2D WebGL content. It’s great for creating graphical visualizations and games. Combining Fable with the PixiJS bindings allows us to do this with F#.
Gearing up for getting down
If you’re playing along at home, you’ll need these:
- .NET Core 2
- F#
- Node.js and Yarn
Installing the template
To make Fable PixiJS apps easy to set up, the fable-pixi-template was created. Assuming you have a working .NET Core environment, you can install the template from the command line like so:
dotnet new -i Fable.Template.PixiCreating a new app
Once the template is installed, you can use it to create a simple app to base your project on:
dotnet new fable-pixi -n PixiTestThis will create a PixiTest directory and generate some scaffolding for the template app. The app is a Fable port of the PixiJS Basics example. To run it, you first need to install some JavaScript dependencies:
cd PixiTest
yarn install
…then install some .NET dependencies:
cd src
dotnet restore
…then compile and run:
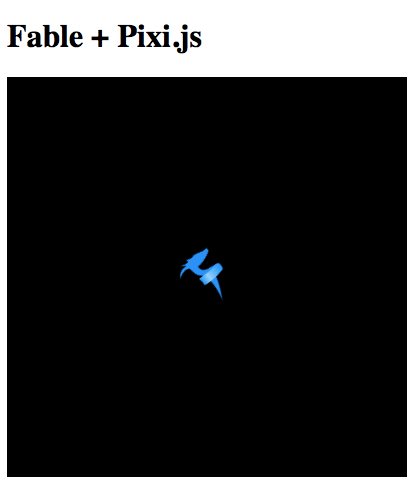
dotnet fable yarn-startThis will invoke the Fable compiler which will compile the F# source into JavaScript, then use webpack to bundle the project and serve it using the webpack dev server on port 8080. Assuming everything went well, you should be able to open a browser to http://localhost:8080 and see a rotating Fable logo:
App Source
The F# source for the app can be found in the src/App.fs file. It’s pretty short (I’ve ommitted comments):
module PixiTest

open Fable.Core.JsInterop
open Fable.Import.Pixi
open Fable.Import.Browser

let options = jsOptions<PIXI.ApplicationOptions> (fun o ->
    o.backgroundColor <- Some 0x000000
)

let app = PIXI.Application(400., 400., options)
document.body.appendChild(app.view) |> ignore

let bunny = PIXI.Sprite.fromImage("fable_logo_small.png")

let renderer : PIXI.WebGLRenderer = !!app.renderer

bunny.anchor.set(0.5)
bunny.x <- renderer.width * 0.5
bunny.y <- renderer.height * 0.5

app.stage.addChild(bunny) |> ignore

let tick delta =
  bunny.rotation <- bunny.rotation + 0.1 * delta

app.ticker.add(tick) |> ignore
Source Tour
Let’s break the code down, starting from the beginning:
module PixiTest

open Fable.Core.JsInterop
open Fable.Import.Pixi
open Fable.Import.Browser
After the module statement which defines our only module, some F# libraries are imported:
- Fable.Core.JsInterop: Converts F# data to/from JavaScript objects, JSON, provides operators for dealing with JavaScript, etc.
- Fable.Import.Pixi: F# PixiJS bindings to the PixiJS project.
- Fable.Import.Browser: F# bindings for the DOM/BOM.
let options = jsOptions<PIXI.ApplicationOptions> (fun o ->
    o.backgroundColor <- Some 0x000000
)
When creating a PixiJS application, an options object allows you to set various Application settings. We use it here to set the background color to 0x000000 (black). Fable provides jsOptions as a way to create type-safe F# objects that will compile to POJOs. The JS result of the options object is { "backgroundColor": 0 }.
The backgroundColor property is an option type (int option), so a Some expression is used to provide a value.
Note that the options object could also have been created using the createEmpty function:
let options = createEmpty<PIXI.ApplicationOptions>

options.backgroundColor <- Some 0x000000
See the Plain Old JavaScript Objects section of the Fable documentation for more info.
let app = PIXI.Application(400., 400., options)
document.body.appendChild(app.view) |> ignore
Here we create a PixiJS Application and append its view to the document’s body. The height and width of our app as well as the options object are used to create the Application. The result of the appendChild call is a Node. If we don’t use the Node result, the F# compiler will warn us, so we pipe it to ignore.
let bunny = PIXI.Sprite.fromImage("fable_logo_small.png")The term “bunny” comes from the PixiJS project’s PixiJS Basics example that this Fable version was based on. Here we’re using the snazzy Fable dragon logo image to create a PIXI.Sprite. A Sprite is just an image that can be rendered to the screen.
The fable_logo_small.png logo image is served from the public directory of the project (in this case by webpack’s dev server if you invoked the fable yarn-start command earlier).
let renderer : PIXI.WebGLRenderer = !!app.rendererI’m not 100% sure on this one, but I believe this is creating a renderer of type PIXI.WebGLRenderer and dynamically casting (the double-bang function) the application’s renderer to it.
bunny.anchor.set(0.5)
bunny.x <- renderer.width * 0.5
bunny.y <- renderer.height * 0.5

app.stage.addChild(bunny) |> ignore
Each Sprite object has an anchor point that defines an origin location for the Sprite. When positioning a Sprite by setting its x and y coordinates, the anchor point of the Sprite is what gets moved to the x and y coordinates. The initial anchor point of a PixiJS Sprite is 0, 0 (the top-left of the Sprite). Here we’re changing the anchor point to the be center of the image. We then set the Sprite’s x and y coordinates to the center of the renderer (200, since 400 was used for the width and height earlier).
We then add the Sprite object to the Application’s stage. The stage is the app’s root container. A container holds a collection of display objects. Our stage only contains one display object: the logo Sprite.
let tick delta =
  bunny.rotation <- bunny.rotation + 0.1 * delta

app.ticker.add(tick) |> ignore
PixiJS provides a Ticker class that runs an update loop. The Ticker class has an add function that allows you to add a listener function. When the Ticker’s loop iterates, it will call the listener function, passing it the time since the last animation frame, called delta. Using the delta value allows us to update the rotation in a time-based manner rather than tying the animation to whatever framerate it happens to run in.
And that’s the Basic template app. If you have the app running using the webpack dev server, you can make changes to the source and Fable will compile it and your browser will refresh with the changes.
Hopefully this post provided you with enough to get started making your own Fable and PixiJS creations.
Where to Go Next
- Samples-Pixi: Start here to grok how to use F# with PixiJS. The runnable samples can be found here. Thanks Whitetigle!
- Fable PixiJS bindings: The PixiJS bindings (also by Whitetigle).
- PixiJS: The official PixiJS site. See the “Resources” link for links to documentation, tutorials, forums, etc.
- The PixiJS subreddit.
- The Coding Train by Daniel Shiffman. Although these videos focus on the Processing and P5.js languages, there are lots of cool ideas presented. Also check out his book The Nature of Code.
#fsharp #pixi #advent