Taking Ionide Out for a Spin
Dec 1, 2015This post is part of the F# Advent Calendar in English 2015. Be sure to check out the other posts!
Ionide is a set of plugins that allow cross-platform F# development within the Atom and Visual Studio Code text editors. The project was started by Krzysztof Cieślak earlier this year and has grown to a handful of contributors since. Development of the plugin is done in F# and transpiled to JavaScript using FunScript. The project is young but shows lots of promise.
In this post, I’ll take Ionide out for a spin using the Atom editor. I’ll walk through the install/configuration process and use a comically short F# script to examine some features. Although the platform used here is Mac OS, you should be able to follow along in Windows or Linux with few changes.
Prerequisites
Make sure you already have F# installed. If you need help, go to http://fsharp.org, click the “Use” link at the top of the page, then select your platform and follow the instructions there.
Install Atom
Installation of Atom is easy: head to the Atom Home Page and click the Download button. The button’s text should display your autodetected platform:
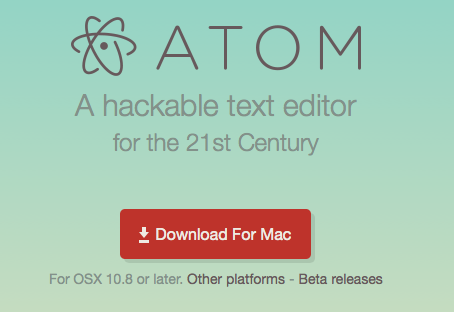
In my case, this means doing the Mac download-unzip-copy-application dance. If you get stuck, consult the “Installing Atom” section in th Atom Flight Manual. Once you have Atom installed, run it and you should see this screen:

We can install the Ionide packages by clicking the “Install a Package” button or by opening the Settings pane with command-, (comma). If you’re running out of room, close the other tabs. Click the “+ Install” button on the left side of the Settings pane. Under “Install Packages”, in the search field, type “ionide” and press enter:
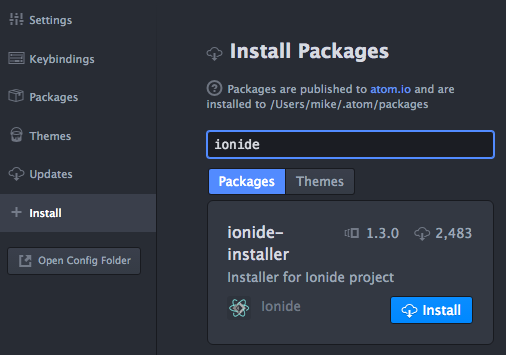
This should provide you with a list of Ionide-related packages. Find the one called “ionide-installer” (it was listed first in my search results) and click its Install button. You’ll be presented with this popup detailing the packages being installed:

Note: this popup sat unchanged for a long time on my install. After several minutes, the progress bar started to move, and eventually I was presented with this popup:

Once all the Ionide dependencies are installed, we need to make some configuration changes.
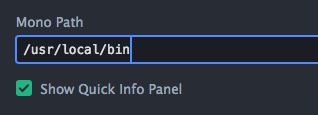
With the Settings pane open, click on the Packages navigation button on the left side of the pane. Scroll down the list of installed packages on the right until you see “ionide-fsharp” and click on its panel (anywhere that’s not a link to something else). Sometimes there will be an explicit “Settings” button in the pane. This should bring up the ionide-fsharp package-specific settings. Scroll down until you see “Mono Path”. Make sure it is set to the directory the mono executable is located in on your system. I had to set this to /usr/local/bin:
Once this is set, go back to the installed packages list (scroll back to the top and select Packages) and set the Mono Path for the ionide-paket package. Although we won’t be using Paket in this post, setting this will save you a headache later if the default isn’t correct.
And that’s it. Just to be safe, close Atom. With that, we are all set to start writing F# applications.
A Simple Script
I haven’t yet wrapped my head around how Atom projects and directories work with F# Projects and Solutions (although opening existing Projects and Solutions “just works”), so we’ll start with a small F# script. To get going with something simple, create a project directory, then use atom to open a new file:
mkdir -p ~/Documents/projects/ionide
cd ~/Documents/projects/ionide
atom hello.fsx
You should be presented with a tab having the title “hello.fsx” and an empty file buffer ready to start typing in. Type the following into the buffer:
let add x y = x + y

printfn "%i" (add 3 5)
Since the file being opened/created had the .fsx extension, Ionide should have been active and you should have already noticed several features.
Basic Feature Tour

The first thing to notice is that Ionide has colored the syntax. To change the colors being used, open Settings, then click on “Themes” where you can change Atom’s UI Theme as well as the Syntax Theme. New themes can be installed under the Install navigation button in the Settings pane.
Autocompletion
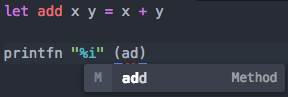
In line 3 if you start to type “ad”, Ionide will suggest the add function. If you type tab or enter, it will autocomplete the function name for you. Typing escape will close the suggestion list. If you accidentally close the suggestion list, you can force it to open by typing control+space. Autocompletion works for namespaces, fields, classes, functions, values, etc.
Error Highlighting

The linter will execute as you type, warning you of errors. Notice here how Ionide caught an int value trying to be used with the “%s” string format placeholder. Not bad!
A few things will happen if your code has errors:
- A red dot will appear at the beginning of a line containing an error.
- Code causing the error will be underlined with a red, dashed line.
- If your cursor is on the error, a popup will display noting what the error is.
- Errors are also displayed in the bottom of the Atom window, noting the line and column of the error in bold. Clicking on the bolded line and column position in the error will place your cursor at the error site.
If Ionide doesn’t detect any errors with the file, a green checkbox along with the text “No Issues” will display in the status bar at the bottom of the Atom window.
Tooltips
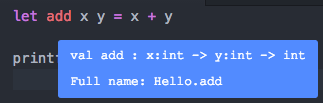
Hovering over different code tokens will bring up tooltips that describe function type signatures, value types, etc. Try hovering over these different values: add, x, y, +, and printfn.
Highlighting Usages
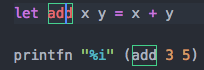
You can find everywhere a value is being used by clicking on it. Ionide will draw a colored box around the value you clicked on as well as anywhere else in the buffer with the same matching color.
You can also right-click on a value and select “Go to Declaration” and Ionide will move the cursor to the value’s declaration location.
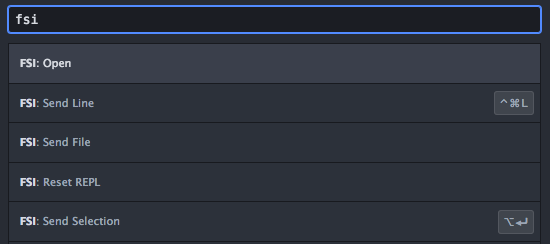
Integration with F# Interactive
Ionide also has some FSI support. If you open the Command Palette (command+shift+p), then type “fsi”, you’ll see several F# Interactive commands:
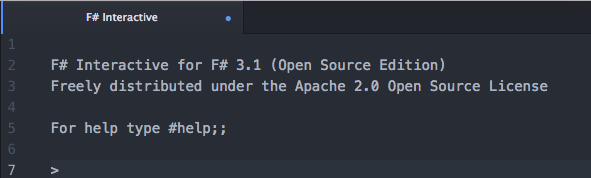
The first item is “FSI: Open”. If you press enter with this item selected, an F# Interactive pane will open to the right of the buffer:
The FSI pane is read-only. Although you can’t type directly into the FSI pane, you can send expressions to it in various ways. If you put focus back on the script buffer, then command-shift-p, type “fsi”, then select “FSI: Send File”, Ionide will send the contents of the whole script over to FSI which will then evaluate it:

You can also send selected text or a line.
Just Scratching the Surface
This post was a very brief introduction. Ionide has a lot more to offer:
- Yeoman F# integration for solution/project scaffolding.
- FAKE integration for building/deploying projects.
- Paket support.
- Fantomas integration for code formatting.
- ionide-webview for previewing web apps without leaving the editor.
Notes
Ionide is still new and growing. Sometimes things break. If the editor should get stuck, errors won’t go away even after you seemingly fixed them, or Atom panes don’t resize correctly when opening/closing them, try doing a View > Reload. This usually fixes problems I’ve encountered.
Despite a few rough edges and limited documentation, Ionide is already pretty impressive. It’s under active development by a leader who listens to the community and responds to issues. It’s a welcome addition, especially for those on the Mac or Linux platforms that want to be a part of the F# experience. And it’s only going to get better.
#fsharp #ionide